Thursday, July 16, 2009
Tuesday, July 7, 2009
Avocado Summer Salad
Because it's so important to eat your greens, and because your garden will provide you with an abundance of lettuce in no time at all, you'll need lots of different salad recipes to mix things up. The same old lettuce, tomato and carrot salad, while very tasty, won't cut the mustard week after week.
One of our favorite salad ingredients is avocado. Not only is it one of the most nutritional fruits out there, but it's silky texture helps emulsify the salad dressing, creating a rich meal all on its own.
In this variation, we used fresh corn cut off the cob (although canned or frozen corn kernels would work just as well), diced avocado and cucumber to compose a refreshing summer salad.
1 head lettuce, torn into bite-sized pieces - red leaf, green leaf, butter lettuce or any other variety will do
kernels cut from 2 boiled or steamed sweet corn cobs (or use 1 can of canned corn kernels or 2 cups defrosted frozen corn)
1 English cucumber or 2 pickling cucumbers, diced
1 large, ripe Hass avocado
4 Tablespoons extra virgin olive oil
1-2 Tablespoons white wine vinegar, to taste
salt and pepper
To prepare the avocado, slice the fruit in half around the pit. Twist the halves to separate, then carefully remove the pit -- gently tap the pit with the blade of your knife, then twist the avocado half and pit in opposite directions to loosen and remove. Scoop the avocado out of the skin with a spoon, making sure to keep the flesh in one piece. You can now easily dice the flesh into 1/4-inch pieces.
Combine lettuce, corn, cucumber and avocado in a large bowl. Whisk together oil, vinegar and mustard in a small bowl. Once the dressing is combined, drizzle over the salad and toss to combine. Season with salt and pepper to taste.
Optional additional ingredients: crumbled feta cheese, shaved parmeggiano cheese, halved cherry tomatoes, toasted pine nuts, golden raisins or fresh herbs. If you think of other combinations, or if you have a great salad recipe, please send it to us at theyardfarmer@gmail.com. We might feature it on the Yard Farmer blog to share with everyone!
Monday, June 22, 2009
Summer Solstice Festival
Last Sunday was the longest day of the year-it really was. And there was no better way to celebrate that than attending the 1st annual Summer Solstice Festival at the Wild Oats Garden. There was so much to do. We started off with some amazing dishes by fellow gardener Chef Paul Buchanan's Primal Alchemy Catering. Then of course we entered the "Guess the Weight of the Zucchini Contest" -something we are naturally good at. We visited the new heritage chickens and enjoyed some amazing live music . The Wild Oats Garden is administered by the non-profit Long Beach Organic and is truly a remarkable example of a community run operation.
Friday, May 29, 2009
Chard Recipes Part One: Mac and Cheese
With chard and other leafy vegetables comes that inevitable question: if I don't put it in a salad or saute it, what can I do with it? Thankfully, chard (swiss, rainbow and other cultivars of this leafy green) is actually a pretty versatile vegetable.
We're going to give you a few different recipes that show you what you can cook with chard. Just remember that you don't necessarily have to eat it by itself - it's great when combined with fish, lamb and a range of other vegetables.
Chard Recipe 1: Mac and Cheese With Chard
First off, chard goes really well with cheeses and white sauces. One basic recipe that the kids will probably like is mac and cheese. Of course if you're actually interested in how your food tastes, you won't want to just mix a box of Kraft mac and cheese with some chopped chard and call it a day. Thankfully, mac and cheese is a pretty straightforward recipe, even when made from scratch.
Ingredients
6 tbsp butter or 3 tbsp butter and then 3 tbsp canola oil
1/2 large onion, diced
2-3 garlic cloves, minced
1/4 cup unbleached all-purpose flour
3 cups 2% milk
4 cups of grated cheese (gouda or smoked gouda are good, so are some Italian cheeses, like pecorino romano, etc., I'll talk more about cheese in a bit)
1/4 tsp nutmeg
1 to 1 1/2 lbs. swiss chard, rinsed, ribs removed
12 oz. elbow macaroni (penne and rotelli work well, too)
1 cup of breadcrumbs
1/4 tsp cayenne pepper (optional)
1/4 tsp smoked spanish paprika (optional)
1/4 tsp ground black pepper
Before we get started, let's talk about cheese. For this recipe, you can use a wide range of cheeses and it's probably a good idea to experiment to find out what you and your family likes to eat. Gouda, swiss, parmigiano reggiano, pecorino romano, Monterey jack, muenster, sharp cheddar, etc. are all good cheeses to use. It's actually not a bad idea to mix two cheeses, for example one sharper cheese and one milder one, say gouda and sharp cheddar, or pecorino romano and mozzarella, to get a more interesting flavor for your mac and cheese.
Directions: First, heat 3 tbsp of butter or oil in a large pot over medium heat. Add the diced onion, then the flour and garlic, and saute those ingredients until the garlic and onions become translucent. Gradually whisk in the milk and bring the mixture to a boil (should take a few minutes). Add half (2 cups) of your grated cheese and stir it until the cheese is melted into the mixture.
Next, add the spices you like. If you're going to add nutmeg, you probably don't want to add the smoked paprika. If you to give your mac and cheese a smoky flavor, though (for example if you used smoked gouda as the cheese), I would add the smoked paprika and forgo the nutmeg. Cayenne adds heat and will work with nutmeg without affecting the flavor too much, but use the spice only if your family likes a spicier mac and cheese. Good spice combos are nutmeg and black pepper or smoked paprika and cayenne.
Next, grease a 13 x 9 x 2-inch glass baking dish and pre-heat the oven to 350 degrees F. Then, while you're cooking the cheese sauce, start a pot of boiling water. Add the chard to the boiling water and cook it for about a minute (until it's tender but not overly wilted). Remove the chard and let it cool. Bring the water back to a boil so you can re-use it to cook the pasta. Drain the pasta once it's cooked and add it immediately to the cheese sauce. Stir it all together.
Chop the chard up into small strips. Pour about a third of the mixture into the baking dish and sprinkle half of the chard onto the first third. Also add 1 cup of the remaining cheese. Next, add the second third of the pasta/cheese mixture and add the rest of the chard to it. Lastly, add the final third of the pasta/cheese mixture and sprinkle the remaining cheese as well as the breadcrumbs on top. Bake the mixture for 40 minutes. Remove from the oven and then let cool for 10-15 minutes.
Note that this recipe is also pretty good with sausage of some kind added to the mixture. If you do decide to add sausage, cook it first (boil it if you want to make it somewhat healthier), dice it into small pieces and then add it right before you bake this dish when you're pouring the pasta/cheese mixture into the pan. Chicken sausage is a good substitute if you want to make this recipe slightly healthier. Divvy the chopped sausage into thirds and add it in layers along with the chard so you don't end up with a sausage layer by itself.
This dish probably serves 4-5 normal people, maybe 3 really hungry people. This recipe was adapted from a May 2009 recipe from Bon Appetit magazine (the cheese types, sausage and spicing suggestions are original additions).
Saturday, May 23, 2009
Gardening Game for Nintendo DS
This isn't for everybody, obviously, but I just found out that there's a spin off of another popular Nintendo DS game series (Cooking Mama) that now has a gardening version called Gardening Mama. Although a lot of the game looks fairly cartoony and simplified, the game is a cute intro to the idea of gardening. Anyway, just thought this would be fun for kids who own a DS who are into video games (or adults like me who still play video games). Of course the best way to get kids into gardening is to actually get out into the garden with them and have them plant something, but for rainy days and family vacations, this is pretty cool. Also, let's face it, kids play video games a lot these days, so if they're going to play anyway, directing them to games more like these is a good idea. Check out the link above when you get a chance.
Friday, April 24, 2009
The Mighty Container Garden
Spring is in the air and its time to get those peppers, tomatoes and zucchini seedlings in the ground. You might feel left out if you're lacking ground to plant in (by that we mean soil), but fear not! The Yard Farmer has an innovative solution for those with unused patio and balcony space -the container garden.
A well-managed container garden can help take a sizable chunk out of the
produce bill, and as our pictures can attest, the Yard Farmer is able to grow organic produce for you and/or your family even in living areas without a back yard or a large area for growing fruit and vegetables. We offer a variety of custom gardening solutions, as you can see from the pictures here.
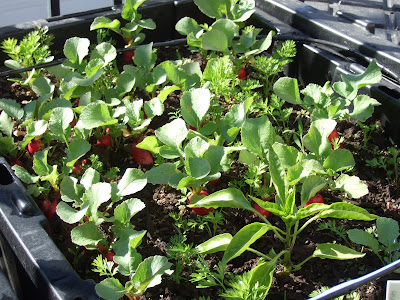
In this garden we've planted freckled loose leaf lettuce, romaine, red velvet and mesclun lettuce, tomatoes, swiss chard, radishes, carrots, manzano peppers, bell peppers and "California Wonderful" peppers, spinach, bush beans, white sweet corn, broccoli and cantaloupe, just in this small space.
Also, using drip irrigation connected to a unique resevoir system, we're able to reduce the amount of water normally required to grow plentiful amounts of produce, and even less than is used in many kitchen gardens.
We'll keep you updated on how our balcony gardens are doing throughout the warm, summer growing season. If you're interested in Yard Farmer's balcony garden solutions for your space, please contact us at theyardfarmer at gmail.com.
Thursday, April 23, 2009
Earth Week!
Subscribe to:
Posts (Atom)